First aid & medical
What untrained adults can safely do for the injuries and illnesses that matter most. Read it now; in a real event use the Emergency page for the short versions. A hands-on first aid course (Red Cross or equivalent) is worth more than any text — take one when you can.
- The first minutes
- CPR
- Choking
- Bleeding & tourniquets
- Shock
- Burns
- Fractures & sprains
- Heat illness
- Dehydration
- Wound care
- Medicine cabinet
- Caring for the sick
- When to evacuate someone
The first minutes — every emergency
The same sequence starts every first-aid event. It protects you from becoming a second casualty and stops you missing the injury that kills quietly while you bandage the one that looks dramatic.
- Safety first. Stop. Look for what hurt them — traffic, fire, live wires, falling debris, gas, deep water. If the scene is dangerous, do not enter; get help. A second casualty doubles the tragedy and halves the rescuers.
- Check response. Speak loudly, tap the shoulders: “Are you okay?”
- Shout for help / call emergency services. Put the phone on speaker so your hands stay free. Send a bystander for the first aid kit and (in cities) a defibrillator.
- Airway and breathing. Unresponsive: tilt the head back, lift the chin, and check breathing for up to 10 seconds. Not breathing or only gasping → CPR. Breathing but unresponsive → recovery position.
- Stop major bleeding — the fastest killer after a blocked airway. See bleeding control.
- Then everything else — burns, breaks, smaller wounds — while keeping them warm and talking to them.
CPR — cardiopulmonary resuscitation
When the heart stops, brain damage begins within minutes. Chest compressions keep blood moving until professionals or a defibrillator arrive. Bystander CPR doubles or triples survival — and an untrained person doing hands-only CPR is enormously better than no one doing anything. You cannot make a person in cardiac arrest worse.
Adults
- Confirm: unresponsive to shouting and shaking, and not breathing normally (occasional gasps are not breathing).
- Call emergency services on speaker. Send someone for an AED if in a public place.
- Lay them flat on their back on a firm surface. Kneel beside the chest.
- Heel of one hand on the center of the chest (lower half of the breastbone), second hand on top, fingers interlocked, arms straight, shoulders directly above your hands.
- Push hard and fast: 5–6 cm deep, 100–120 compressions per minute — the rhythm of “Stayin' Alive”. Let the chest come fully back up between pushes; don't lean on it.
- If trained in rescue breaths: 30 compressions, then 2 breaths (head tilted, chin lifted, pinch the nose, seal your mouth over theirs, 1 second per breath until the chest rises). If untrained or unwilling: continuous compressions only — this is real CPR and it saves lives.
- Compressions are exhausting and quality drops fast: swap rescuers every 2 minutes with minimal pause.
- Do not stop until: professionals take over, an AED tells you to stand clear, the person clearly wakes (moves, opens eyes, breathes normally), or you are physically unable to continue.
AED (defibrillator)
- Turn it on the moment it arrives — it speaks and walks you through everything.
- Bare the chest, dry it if wet, attach the pads as pictured on them. Continue compressions while pads go on.
- When it analyses and if it says shock: make sure no one touches the person, press the shock button, then resume compressions immediately.
Children and babies
- Child (1 year to puberty): same rhythm; compress about 5 cm with one or two hands. Give 5 initial rescue breaths first if you are able — children usually arrest from breathing problems, so breaths matter more.
- Baby (under 1): 5 gentle initial breaths covering mouth and nose; compress with two fingers (or two thumbs) in the center of the chest, about 4 cm, same fast rhythm; 30:2 after.
- Alone with a child or baby: do 1 minute of CPR before pausing to call, if no one else can call.
Choking
Total airway blockage kills in minutes and is completely fixable by whoever is standing there. The decisive question: can they cough or make sound?
- Ask: “Are you choking?” If they can speak, cry, or cough forcefully — encourage coughing and stay ready. Do not slap the back of someone who is coughing effectively.
- Silent, clutching the throat, unable to breathe: lean them well forward and give 5 sharp back blows between the shoulder blades with the heel of your hand.
- Still blocked: 5 abdominal thrusts — stand behind them, wrap your arms around, fist thumb-side in just above the navel, grasp it with the other hand, pull sharply inward and upward.
- Alternate 5 back blows and 5 thrusts until the object clears or they go limp.
- If they collapse: lower them to the floor, call emergency services, start CPR. Compressions can eject the object — glance in the mouth between cycles and remove anything you can see (no blind finger sweeps).
- Pregnant or very large person: chest thrusts instead — fist on the center of the breastbone, sharp inward pulls.
- Baby under 1: lie the baby face-down along your forearm, head low, supporting the jaw; 5 firm back blows between the shoulder blades with the heel of your hand; turn face-up and give 5 chest thrusts with two fingers, center of the chest. Alternate. Never abdominal thrusts on a baby.
- Anyone who received abdominal thrusts should be checked by a doctor afterwards — the thrusts can injure internal organs.
Bleeding control & tourniquets
A person can bleed to death from a limb wound in a few minutes; a bystander with two hands and a shirt can prevent almost all of those deaths. The tool is pressure — boring, hard, uninterrupted pressure.
Serious bleeding
- Call for help. Gloves or a plastic bag over your hands if instantly available — but do not delay for them.
- Expose the wound (cut or tear clothing away) so you press the actual bleeding point.
- Press directly on the wound with a folded cloth pad and your full weight through straight arms. Real pressure hurts the patient — that means you're doing it right.
- Do not lift the pad to check. If blood soaks through, add more cloth on top and keep pressing.
- When bleeding slows, bind the pad tightly in place with a bandage or torn cloth and keep the limb still. Rest, keep them warm, treat for shock.
- Object embedded in the wound: never pull it out — it plugs the hole. Press around it and pad it in place.
Wound packing — deep wounds in neck, armpit, groin
Where a tourniquet can't go, pack: push cloth or gauze deep into the wound cavity with your fingers, right onto the bleeding vessel, adding more until the cavity is full, then press hard on top without letting go for at least 10 minutes.
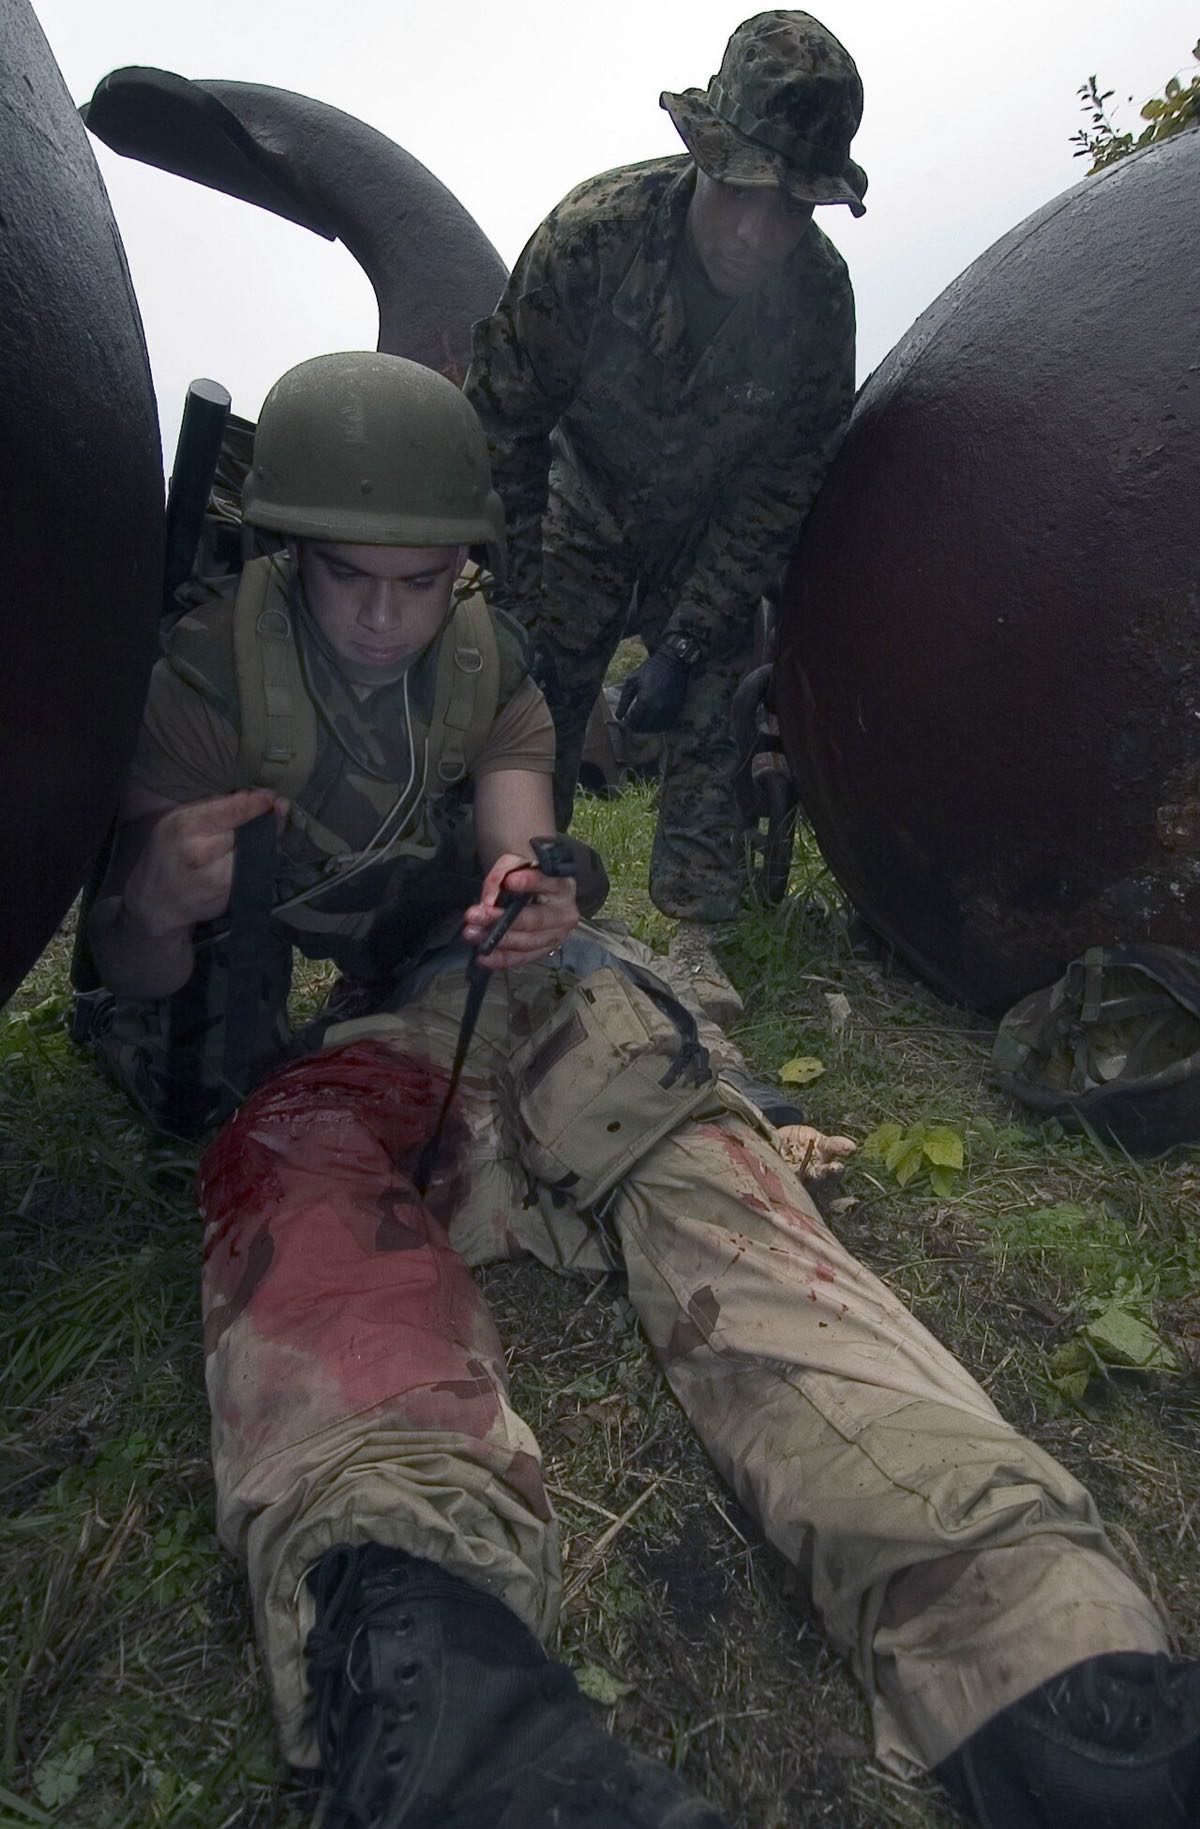
Tourniquet — arm and leg wounds only
For limb bleeding that direct pressure cannot control (spurting blood, partial amputation, multiple casualties, or you must move). A commercial tourniquet (CAT style) in the first aid kit is best; improvise with a folded cloth band at least 4–5 cm wide plus a strong stick to twist — never wire or thin cord.
- Place it 5–7 cm above the wound (between wound and heart), never over a joint.
- Tighten until the bleeding stops — not just slows. This is very painful; that does not mean it's wrong.
- Secure the rod/windlass so it cannot unwind.
- Write the time on the tourniquet, their skin, or your arm. Say it at every handover.
- Do not loosen or remove it — that decision belongs to a hospital. It can stay safely for the hours evacuation takes.
- If one tourniquet at full tightness doesn't stop it, add a second one just above the first.
Skill card: splinting with household items →
Nosebleed
Sit leaning forward, pinch the soft part of the nose continuously for 10–15 minutes, breathe through the mouth, cold pack on the bridge. No head back, no swallowing blood. Seek care if it hasn't stopped after 30 minutes of pressure.
Shock
Shock here means circulatory collapse — not fright. After serious bleeding, burns, crush injuries, severe vomiting/diarrhea, or allergic reactions, the body can no longer push enough blood to the organs. It kills quietly while everyone stares at the visible wound.
Recognize: pale, gray, or ashen skin that is cold and clammy; fast weak pulse; fast shallow breathing; thirst; nausea; anxiety or confusion; drowsiness that worsens.
- Treat the cause you can treat — above all, stop bleeding.
- Lie them flat. If injuries allow, raise the legs on a bag or cushion.
- Keep them warm: blanket under and over. Shock plus cold is a deadly pair, even in our climate at night.
- Loosen tight clothing. Reassure calmly and keep talking to them.
- Nothing to eat or drink — surgery may follow, and vomiting endangers the airway. Wet their lips if thirst torments them.
- Check breathing and response every few minutes. Unresponsive but breathing → recovery position. Not breathing → CPR.
- This person needs a hospital — arrange evacuation urgently.
Burns
- Stop the burning: douse flames (stop-drop-roll), remove the person from the source, cut power before touching electrical burn victims.
- Cool the burn with cool running water for 20 minutes. This is the single most useful treatment and keeps helping up to 3 hours after the burn. No ice, no iced water — ice deepens the damage.
- While cooling, remove jewelry and loose clothing near the burn before swelling starts. Never peel off cloth stuck to the burn.
- Keep the rest of the body warm while you cool the burn — burn victims chill easily, especially children.
- Cover loosely with cling film (lay it on, don't wrap tightly), a clean plastic bag, or a sterile non-fluffy dressing. This kills pain from air exposure and keeps it clean.
- Pain relief: paracetamol or ibuprofen per the packet.
- Never apply: butter, oil, toothpaste, ice, or cotton wool. Do not burst blisters.
How big is the burn? — the Rule of 9s
Medical helpers will ask “what percent of the body is burned?”. Estimate with the Rule of 9s below — or quicker: the casualty's own palm (with fingers) ≈ 1% of their body surface. Adults with burns over ~10% (children ~5%) need professional care urgently; over ~15–20%, treat for shock while evacuating.
Get medical care for: any burn larger than the person's palm; any deep burn (white, brown, charred, or painless areas); burns on face, hands, feet, genitals, or over joints; electrical and chemical burns; smoke inhalation (hoarseness, sooty nose, coughing); any significant burn in a baby, young child, or elderly person.
Chemical burns: brush off dry powder first, then rinse with large amounts of running water for 20+ minutes, removing contaminated clothing as you rinse.
Fractures, sprains & head injuries
Suspected broken bone
Signs: deformity, swelling, bruising, pain on movement or weight, grating feeling, or “I heard a crack”. When unsure, treat it as broken.
- Keep it still. The rule is: splint it where it lies — do not straighten a deformed limb.
- Support the limb with hands, cushions, or rolled clothing until it is immobilized.
- Splint so the joints above and below the break cannot move: rigid object (stick, rolled magazine, board) padded with cloth, tied above and below the break — never over it. An injured arm can be strapped to the chest in a sling; a leg can be tied to the good leg with padding between.
- Check circulation past the splint before and after: warm skin and normal color in fingers/toes. Numb, blue, or cold → loosen the ties.
- Cold pack (wrapped, not on bare skin) 20 minutes on/off for pain and swelling. Remove rings and watches early.
- Open fracture (bone through skin): cover the wound with a clean dressing, press around — not on — the bone to control bleeding, splint, evacuate urgently.
- Suspected broken pelvis or thigh, or any fracture with signs of shock: internal bleeding is likely — keep them flat, warm, and evacuate urgently.
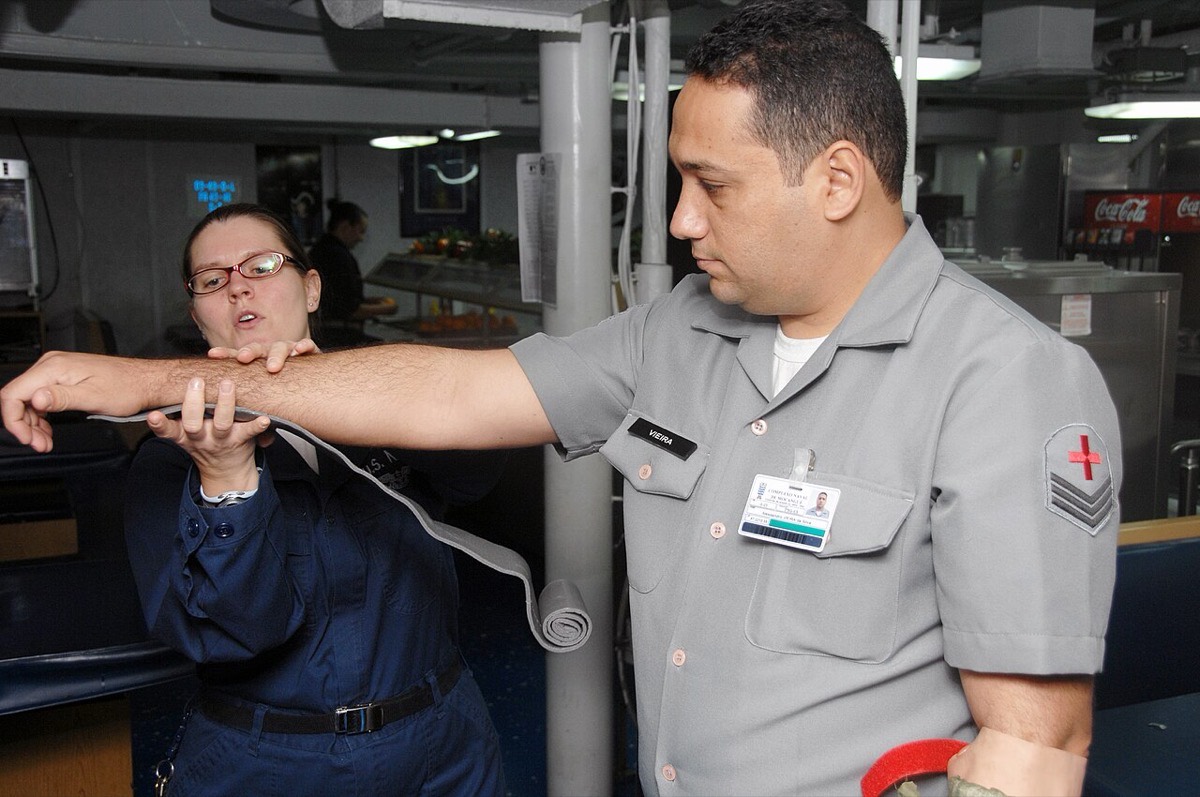
Sprains — RICE
Rest · Ice 20 minutes on/off (cloth-wrapped) · Compression with an elastic bandage, snug not tight · Elevation above heart level. If they cannot bear weight for four steps, or a bone hurts to the touch, treat as a fracture and get an X-ray.
Head injuries
- Knocked out, even briefly → medical assessment. Not knocked out: watch closely for 24–48 hours.
- Emergency signs after any head knock: worsening headache, repeated vomiting, unusual drowsiness or hard to wake, confusion, slurred speech, unequal pupils, fits, clear fluid from nose/ear, weakness in limbs. Any of these → hospital now, waking checks on the way.
- Suspected neck/spine injury (fall from height, dive, vehicle crash, blow to head/back — neck pain, tingling, weakness): keep the head still in line with the body, hold it steady with your hands, and do not move them unless fire, water, or a blocked airway forces it.
Heat illness — exhaustion & heatstroke
Heat illness is a ladder: cramps → heat exhaustion → heatstroke. You must recognize which rung you're on, because heat exhaustion is treated with shade and fluids, while heatstroke is a life-threatening emergency measured in minutes of cooling.
Heat exhaustion
Signs: heavy sweating, pale clammy skin, headache, dizziness, nausea, cramps, weakness, fast pulse — but thinking clearly.
- Stop all activity. Move to shade or the coolest room, lie down, raise the feet slightly.
- Strip excess clothing. Cool the skin: wet cloths, spray and fan, cool (not icy) shower.
- Rehydrate: water or oral rehydration solution in steady sips — a glass every 15–20 minutes. Add ORS or lightly salted fluids if they've been sweating for hours.
- They should improve within 30 minutes. No improvement in 30–60 minutes, or any confusion appears → treat as heatstroke.
- No exertion for the rest of that day and the next.
Heatstroke — emergency
Signs: confusion, agitation, slurred speech, staggering, fainting, or fits; skin hot (dry or still sweaty); body temperature 40°C+. The brain is cooking — cooling cannot wait for the ambulance.
- Call emergency services.
- Move to the coolest place. Remove outer clothing.
- Cool aggressively by any means: best is immersion to the neck in cool water (bath, tank, trough). Otherwise: continuous dousing with water + hard fanning, wet sheets replaced often, ice packs to neck, armpits, and groin.
- Conscious and fully alert: sips of cool fluid. Confused or vomiting: nothing by mouth.
- Unresponsive but breathing: recovery position, keep cooling. Not breathing: CPR.
- Keep cooling until help arrives or they become fully alert and their skin feels normal.
Dehydration & oral rehydration
Signs by stage: thirst and dark urine → dry mouth, headache, weakness, little urine → sunken eyes, skin stays tented when pinched, drowsiness, no urine, in babies a sunken soft-spot and no tears. The last group is severe — evacuate while rehydrating.
- Small frequent sips beat big gulps (which trigger vomiting in the ill): a spoonful every 1–2 minutes for a child, steady small mouthfuls for an adult.
- For diarrhea, vomiting, or heavy sweating, plain water is not enough — use oral rehydration solution (ORS): one sachet dissolved in the stated volume of clean water.
- No sachets? Home ORS: 1 liter of clean water + 6 level teaspoons of sugar + ½ level teaspoon of salt, stirred until dissolved. Taste it: no saltier than tears. Too much salt is dangerous, especially for children — measure carefully.
- Ongoing diarrhea: give ORS after each loose stool (child: half to one cup). Keep offering food once vomiting settles; keep breastfeeding babies throughout.
- Avoid as rehydration: undiluted soft drinks and juices (too sugary — worsen diarrhea), coffee and strong tea, and anything the person can only sip reluctantly.
- Cannot keep anything down for 12+ hours, signs of severe dehydration, or a listless infant → medical care urgently.
Wound care — cuts, scrapes, and infection
When care is delayed, the enemy is infection. Cleaning a wound well in the first hour matters more than anything you put on it afterwards.
- Wash your hands with soap (or sanitizer) before touching any wound.
- Stop the bleeding with direct pressure.
- Clean thoroughly: rinse under running clean water — drinkable water is fine — with mild soap around (not in) the wound. Flush out all visible dirt and grit; use tweezers (flame- or alcohol-cleaned) for embedded bits. Pain during proper cleaning is the price of no infection.
- Pat dry with clean cloth. A thin layer of antiseptic or antibiotic ointment if available.
- Cover with a plaster or non-stick dressing. Change daily, and sooner whenever wet or dirty.
- Gaping edges? Close with butterfly strips/steri-strips after cleaning, pulling edges together without trapping dirt. Deep, gaping, or tendon-deep wounds need professional closure — ideally within 12–24 hours.
- Elevate the wounded part when resting; it halves the throbbing and swelling.
Signs of infection — check at every dressing change: increasing (not decreasing) pain after day 2, spreading redness or red streaks toward the body, swelling, heat, pus, bad smell, fever. Red streaks or fever = serious; seek medical care urgently.
Tetanus: dirty and puncture wounds carry tetanus risk. If your booster is more than 10 years old (5 for dirty wounds), get one. Keep the family's tetanus dates in My Plan.
Animal bites: wash immediately and vigorously with soap and running water for 15 minutes — this is genuine rabies prevention — then seek medical advice about rabies and antibiotics. Same for bat contact and stray-animal scratches.
The home medicine cabinet
Keep it in one known, lockable or high place, cool and dry (not the bathroom — humidity ruins medicine). Check dates twice a year when you check the go-bags.
Medicines
- Paracetamol (adult tablets + children's syrup) — pain and fever.
- Ibuprofen (adult + children's) — pain, fever, inflammation. Take with food; avoid with stomach ulcers, kidney problems, or dehydration.
- Oral rehydration salts — many sachets; the most valuable item in the box.
- Antihistamine (e.g., loratadine/cetirizine) — allergies, stings, itching.
- Antacid, and loperamide for adults' diarrhea only when a toilet-free journey demands it (not for children, not with fever or bloody stool).
- Antiseptic (povidone-iodine or chlorhexidine) and/or antibiotic skin ointment.
- Hydrocortisone 1% cream — rashes, bites, and stings.
- Personal prescription medicines — the real lifeline. Keep a rolling 2-week reserve minimum (more if supply is uncertain), a written list of doses, and photos of the prescriptions. Epinephrine auto-injector and reliever inhaler for anyone who has ever needed one.
Equipment
- Digital thermometer · fine tweezers · scissors · safety pins · disposable gloves (many pairs).
- Adhesive plasters (all sizes) · sterile gauze pads · non-stick dressings · two large trauma/abdominal pads · roller bandages · elastic (crepe) bandage · triangular bandage (sling) · butterfly closure strips · surgical tape.
- Cling film (burns) · instant cold packs · mylar blanket · CPR face shield · irrigation syringe (wound washing) · commercial tourniquet if you can get one.
- Torch, notepad, pencil — and a printed copy of this page and the Emergency page.
Caring for the sick at home
In a crisis, most illness is nursed at home. Good home nursing is simple and mostly about fluids, rest, observation, and not infecting the rest of the family.
The daily routine
- One main carer, who is not elderly, pregnant, or chronically ill. Everyone else keeps distance during infectious illness.
- Fluids are the job. Offer drinks every hour awake — water, ORS, soup, diluted juice. Watch urine color: pale yellow good, dark bad, none alarming.
- Fever control for comfort: paracetamol or ibuprofen per packet, light clothing, a comfortable-not-cold room. No cold baths, no alcohol rubs. More in Remedies.
- Food: small, plain, whenever wanted — appetite returning is recovery. Never force food; always push fluids.
- Record twice a day in a notebook: temperature, drinks taken, urination, symptoms, medicines given with times. This record is gold for any doctor you later reach, and it stops double-dosing between tired carers.
- Hygiene barrier: carer washes hands after every contact; sick person gets own cup, dishes, towel; masks (both) for coughing illnesses; air the room daily; see sickroom hygiene.
- Bed care for the very weak: help them shift position every 2 hours (pressure sores start in a day), sips of fluid at every turn, keep skin and bedding dry.
Watch for the danger signs
Check morning and evening against the red-flag list in when to evacuate. Write down what you see. Trust the trend: “worse than this morning” matters more than any single number.
When to evacuate someone to medical care
In a disaster, going to hospital may be hard or risky, so the question “can this wait?” becomes the most important skill on this page. When any red flag below appears, the answer is no — move, or get professional advice by any channel you have (phone, telehealth, a nurse neighbor).
Red flags — go now, by the safest means available
- Breathing: struggling to breathe, breathing very fast at rest, blue or gray lips/face, wheeze with distress, ribs sucking in with each breath (children).
- Circulation: bleeding you cannot stop, vomiting blood or passing black tarry stool, signs of shock, crushing chest pain or chest pain with sweating/nausea (heart attack — chew an aspirin if not allergic while arranging transport).
- Brain: new confusion, cannot be woken, fits/seizures, sudden one-sided face droop, arm weakness, or slurred speech (stroke — note the time it started), worst-ever sudden headache, stiff neck with fever and light hurting the eyes.
- Fluids: cannot keep any fluid down 12+ hours, severe dehydration signs, no urine for 12+ hours (8 for a child).
- Fever: any fever in a baby under 3 months; fever with rash that does not fade when a glass is pressed on it; fever above 40°C not responding to medicine; fever with confusion.
- Abdomen: severe pain that localizes (especially right lower side), rigid board-like belly, pain with fever and vomiting.
- Injury: open fractures, suspected pelvis/thigh fracture, deep wounds to chest, abdomen, or neck, burns meeting the criteria above, head injury with the emergency signs, any tourniquet applied.
- Pregnancy: heavy bleeding, severe abdominal pain, severe headache with vision changes or swelling, waters breaking early, reduced baby movements.
Moving a sick or injured person
- Call for professional transport first if it exists — moving fragile patients badly does harm. Move them yourself when transport can't come and a red flag is present.
- Stabilize before moving: bleeding controlled, splints on, airway safe (unconscious → someone dedicated to holding the airway/recovery position throughout).
- Choose the gentlest method that works: walking supported → chair carry (two rescuers) → blanket drag (grip the blanket by the head end and drag in line, for danger-zone escapes) → rigid board for suspected spine injuries with the head held steady.
- Send the written record (medicines, times, observations) and their medicine bag with them.
- One family member goes along; the rest stay per the family plan — do not empty the house into a dangerous journey.