Shelter & engineering
The home is your primary shelter. This page is about keeping it working when systems fail: shutting things off safely, hardening rooms, patching damage, and controlling temperature with no power.
- Home hardening
- Shutting off utilities
- Safe rooms
- Emergency repairs
- Improvised tools
- Knots
- Fire-making
- Staying cool
- Staying warm
Home hardening — one weekend of work
- Against earthquake: strap tall furniture and the water heater to walls; move heavy items to low shelves; nothing heavy hung above beds; latches on high cupboards; know where structural (thick, load-bearing) walls are — interior shelter spots go beside them.
- Against blast and storm (glass): glass is the main injury-maker. Clear transparent film on windows holds shards together; a lattice of strong tape is a cruder version for a crisis week. Heavy curtains kept drawn during risk periods catch fragments. Beds out of the line of windows.
- Against fire: smoke detectors (test monthly), extinguisher per floor + kitchen fire blanket, clear escape routes, no flammables around the water heater or stove, sockets not overloaded.
- Against intrusion: solid door hardware — see home security.
- Against heat: external shade beats internal: awnings, shutters, or even fixed reflective foil on the worst summer windows. Seal window gaps (also serves dust-storm sealing). White or reflective roof paint measurably cools top-floor rooms.
- Against water: know where water enters and leaves — roof drains kept clear, floor drains unblocked, and the mains valve reachable (below).
- Know your building: where are stairs, alternate exits, the roof access, the basement? Which neighbor has tools, which has medical training? This knowledge is hardening too.
Shutting off gas, water, and electricity
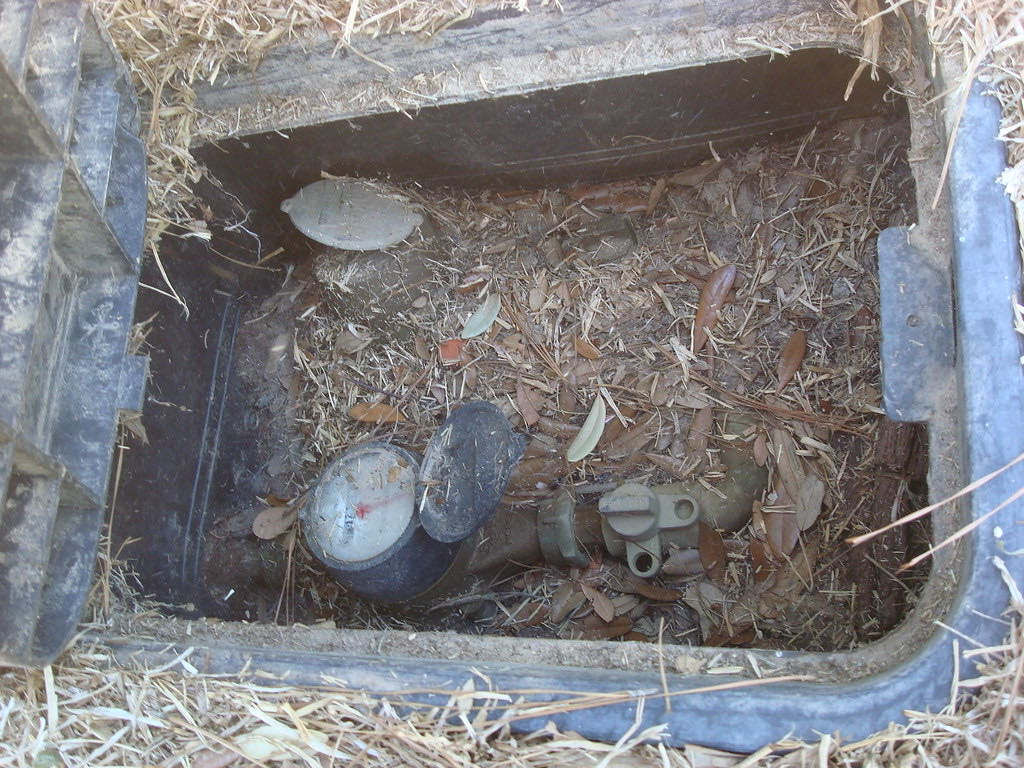
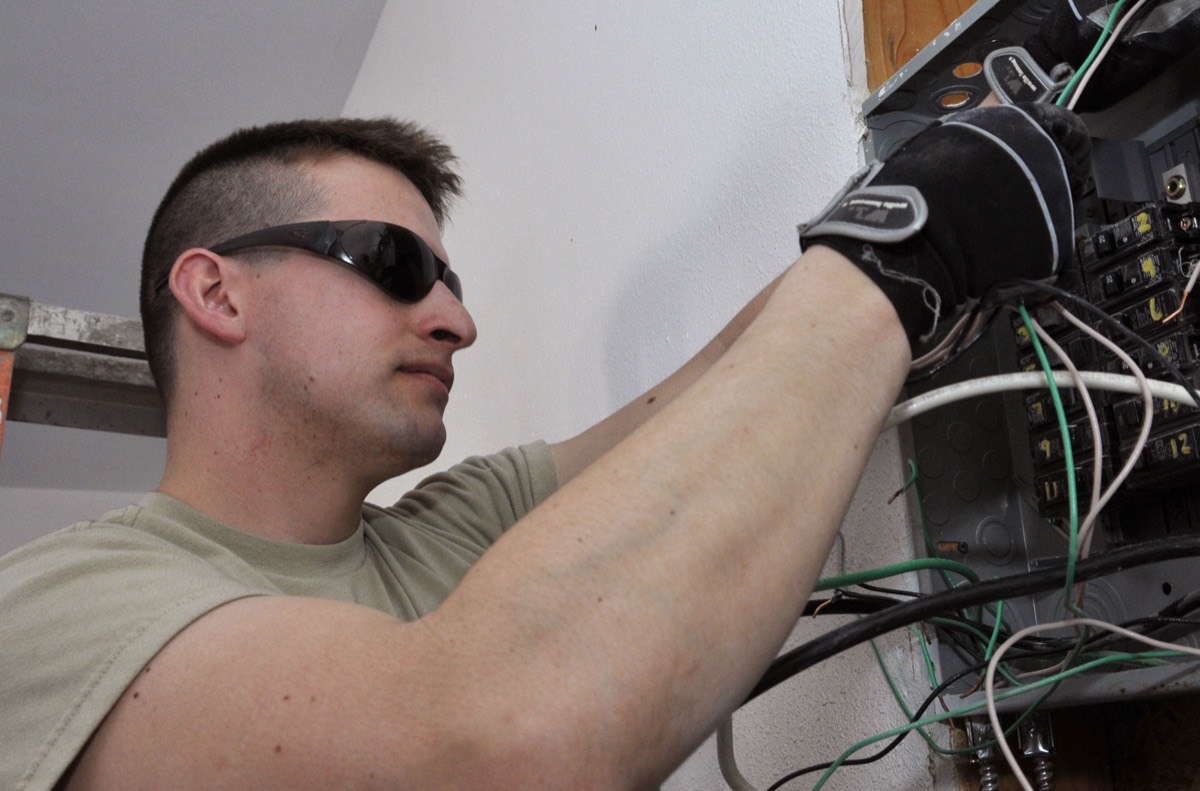
Find all three shut-offs today, label them with tape and marker, and show every adult and teen. In the dark, after a quake, is the wrong time to search.
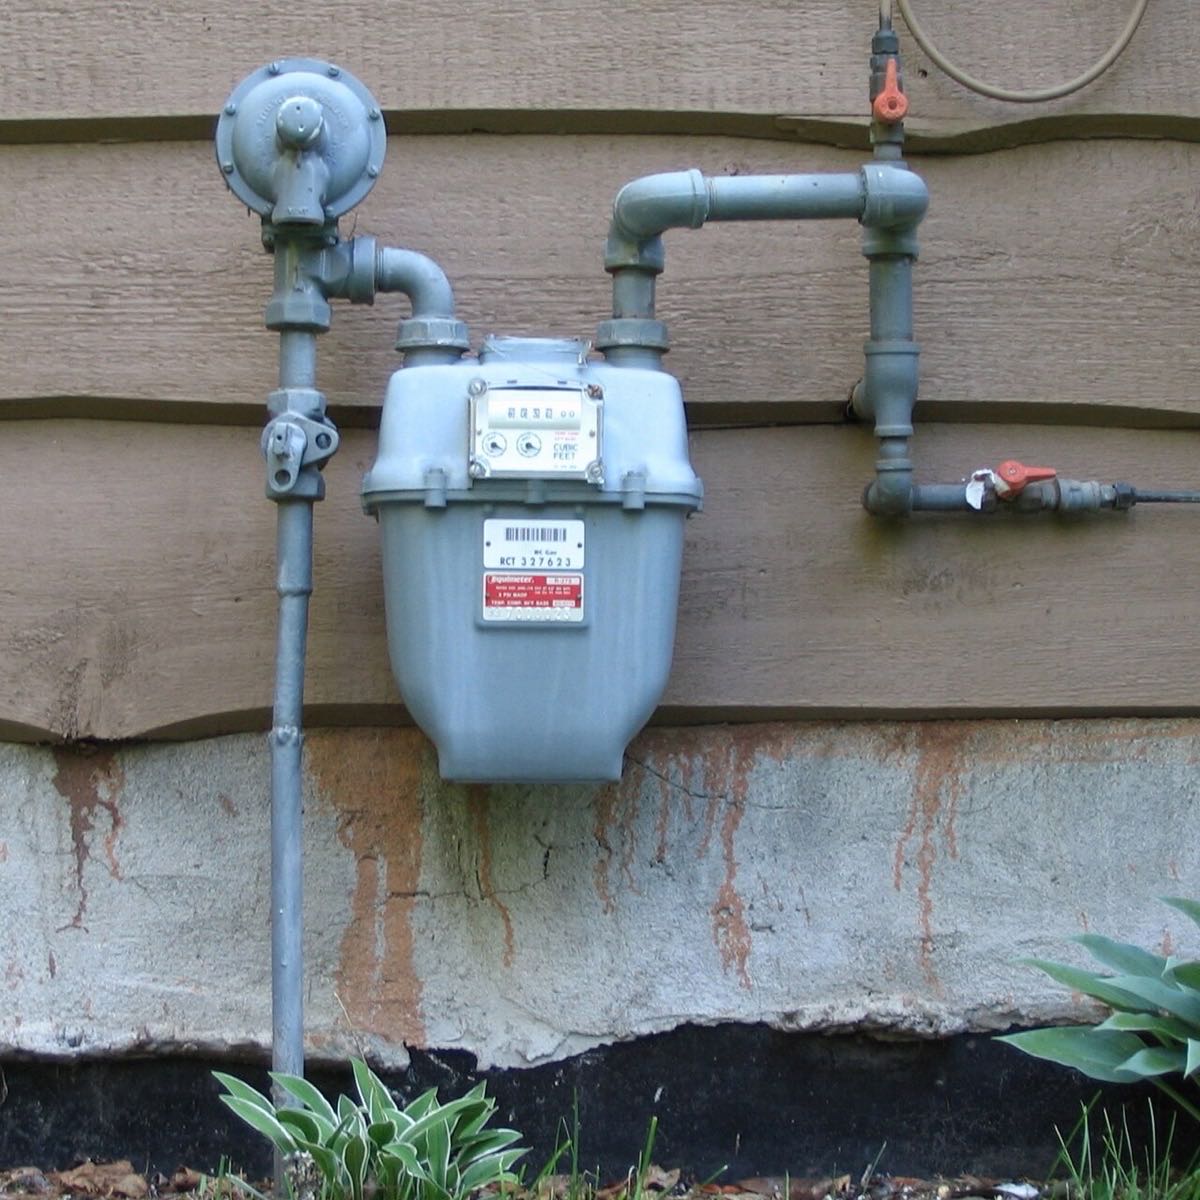
images/personal/gas-valve.jpg — it will appear here, even offline.
images/personal/water-main.jpg.
images/personal/breaker-panel.jpg.
Gas
- Know your setup: gas cylinders (valve on top of the bottle) or piped gas (valve at the meter — usually a lever that is ON along the pipe, OFF across it).
- Keep a wrench or the right spanner hanging beside the valve if it needs one.
- Shut off when: you smell gas, hear hissing, after any earthquake or blast near the house, or before evacuating.
- To shut: turn the lever a quarter-turn so it lies across the pipe; cylinder valves turn clockwise until snug.
- If you smell gas: no flames, no switches on or off, no phones indoors. Open doors/windows on your way out, shut the valve if it's on the path, get everyone outside — see the emergency steps.
- Never restore piped gas yourself after a leak or quake shut-off — the system must be checked and relit professionally. Cylinders: reconnect only with a soap-water bubble test on the connection (bubbles = leak).
Water
- Find the main valve: usually where the supply enters the house, at the street meter, or at the base of the roof tank. Homes with a roof tank often have two — mains inlet and tank outlet. Label both.
- Turn clockwise to close. If it hasn't moved in years, work it gently now and leave it easy to turn — a seized valve during a burst pipe is misery.
- Shut off when: a pipe bursts, a quake may have cracked pipes (protects the clean water in your heater and tank from back-contamination), before leaving the house empty for long, or if authorities warn of contamination.
- After closing, open the lowest tap to drain pressure and stop residual leaking.
Electricity
- Find the breaker panel. Label the main switch and, over a free evening, map which breaker feeds which room (one person flips, one shouts).
- Shut the main off when: flooding threatens or has entered, you smell burning or see sparking, before touching anything electrical that's damaged, or before evacuating.
- Rules that keep you alive: never touch electrical equipment with wet hands or while standing in water; never enter a flooded room until the main is off; treat every fallen cable outdoors as live and stay well back (see downed lines after storms); electrical fires get a dry extinguisher or the breaker — never water.
- Restoring: dry hands, dry floor, main on first, then breakers one at a time; a breaker that re-trips immediately stays off until inspected.
Safe rooms — choosing and preparing
One room can't be perfect for every hazard, so know your best spot for each. The good news: preparing one interior room covers most of them.
| Threat | Best spot | Why |
|---|---|---|
| Blast / conflict | Basement, stairwell core, or interior ground-floor room; away from windows and outer walls | Mass between you and outside; glass is the main killer |
| Chemical / smoke / dust | Interior room on an upper floor, few openings, sealable | Many toxic vapors sink; sealing slows entry |
| Storm / high wind | Smallest interior room, lowest floor, no windows | Short spans and many walls resist wind and debris |
| Extreme heat, no power | Lowest, most shaded room, thickest walls | Coolest thermal mass |
| Earthquake | No “room” — under sturdy furniture wherever you are | You never get time to relocate |
- Stock the main shelter room: water, snacks, torch, radio, power bank, first aid kit, whistle, shoes, and the sealing kit (plastic sheets pre-cut for its window/vents, wide tape, towels, scissors).
- Sealing drill (chemical/dust): door closed, wet towel along its base, tape plastic over window and vents, AC off. Practice once — it should take under 3 minutes.
- A sealed room is not airtight forever — a typical room holds hours of air for a family, far longer than a plume takes to pass. Open up when officials give the all-clear, and unseal for ventilation if anyone becomes drowsy or breathless without another cause.
Skill card: sealing a room in under 3 minutes →
images/personal/safe-room.jpg.
Emergency repairs
Keep a repair box: duct tape, plastic sheeting, tarpaulin, rope and cord, wire, assorted nails/screws, hammer, screwdriver set, adjustable wrench, pliers, utility knife, work gloves, hand saw, pry bar. With that box, most crisis damage is patchable.
- Broken window: gloves and eye protection first. Knock out loose shards from the frame (tap from inside with a tool, never a bare hand). Tape plastic sheeting over the opening, or screw/nail plywood or a flattened cardboard sandwich (cardboard–plastic–cardboard) into the frame. Sweep glass immediately — wet paper towels pick up the slivers.
- Leaking roof: from inside, catch drips and divert with a string taped into the drip path leading to a bucket (water follows the string). From above, only if the roof is flat, dry, and safe: tarp over the area, extending past the leak upslope, edges weighted with blocks or sand — never loose bricks near an edge in wind.
- Burst pipe: main valve off, lowest tap open. Temporary patch on a pinhole: rubber (bike tube, glove) wrapped tight over the hole, clamped with hose clamps, wire, or zip ties. Epoxy putty works on damp pipes if you have it.
- Damaged door / lock: secure inward-opening doors overnight by wedging a chair-back under the handle or screwing a board across the frame; a floor wedge adds seconds and noise.
- Sagging or cracked structure: do not enter rooms with new large cracks, tilted walls, or ceilings dropping debris. Shore a doubtful doorway only to escape — solid timber posts wedged tight vertically. Structural damage is a leave-and-report problem, not a DIY one.
- Sandbags without sandbags: pillowcases, doubled shopping bags, or feed sacks half-filled with sand or soil, folded flap-down, laid like bricks with staggered joints — 2–3 layers turn most nuisance flooding away from a doorway.
Improvised tools & materials
- Cordage from nothing: plastic bottles cut in a spiral make surprisingly strong strapping; bedsheets torn in strips and braided make rope; three strands braided are far stronger than one thick strip.
- Containers: cut bottles = funnels, scoops, cups; a bottle with pinholes = shower/tippy-tap (see hygiene).
- Levers and rollers move rubble: a pry bar or pipe over a block (fulcrum) multiplies your force many times; heavy loads roll on lengths of pipe. Lift with legs, never your back, and never put fingers under a load that could settle.
- Light: a phone torch against a water bottle makes a room lantern; a mirror redirects daylight deep into a windowless room.
- Heat reflector: foil, mylar blanket, or a windscreen reflector doubles a small heat source's usefulness — or shades a hot window.
- Improvised stretcher: two poles through the sleeves of two strong jackets zipped shut, or a blanket rolled tight along both long edges to make grips — test with a healthy person before trusting it with a casualty.
- Char and filter: crushed charcoal from a wood fire, layered between cloth with sand and gravel in a cut bottle, clarifies dirty water (still disinfect after — see purification).
Five knots that cover almost everything
Learn them with real rope; two minutes each. A knot you can tie in the dark is equipment you always carry.
- Overhand loop / figure-eight loop — a fixed loop. Fold a bight (loop) in the rope's end, tie an overhand (or figure-eight, stronger and easier to untie) with the doubled section, leaving the loop out. For hanging, hauling, clipping. The figure-eight: make the bight, twist it one full turn, and pass the loop end back through — it looks like an 8.
- Bowline — a loop that never slips or jams. Small loop in the standing rope (“the hole”); the end comes up through the hole, around behind the standing rope, and back down the hole. Makes a rescue loop, tent loop, or anchor point; unties easily even after load.
- Clove hitch — fast attachment to a pole. Two turns around the pole, the second crossing over the first, end tucked under that cross. Starts and ends lashings, hangs anything from a rail; add two half hitches for security.
- Taut-line / trucker's tension. Taut-line hitch: around the anchor, then two turns inside the loop toward the anchor, one outside — it grips but slides by hand, perfect for tensioning tarp lines. The trucker's hitch (a loop in mid-rope used as a pulley, hauled tight and locked with half hitches) cinches loads on a roof rack tighter than arms alone ever can.
- Square (reef) knot — joining two similar ropes / tying bandages. Right over left, then left over right; the ends lie flat beside the standing parts. Flat and comfortable under a bandage. Do not trust it for life loads; for joining ropes that matter, use two overhand knots tied around each other's standing part (fisherman's knot).
Lashing poles (shelter frames, splints, stretcher poles): start with a clove hitch, wrap 4–6 tight turns around both poles, then 2–3 turns between the poles cinching the wraps, finish with a clove hitch. Tight lashings creak.
Fire-making — safely
- Gather the three sizes first — the classic failure is lighting before you have collected: tinder (cotton wool, paper, dry grass, bark fibers, date-palm fluff — a double handful), kindling (dry twigs, matchstick-to-pencil thick — a big bundle), fuel (wrist-thick and up, dry — snaps with a crack, doesn't bend).
- Build small: tinder nest in the center; kindling above it as a loose cone or lean-to with air gaps.
- Light the tinder at its base, sheltering the flame from wind with your body.
- Feed thin pieces gently as flames grow. Smoke means starving for air — lift, don't smother.
- Add fuel gradually, keeping the fire only as big as the job needs. A small hot fire beats a big smoky one for every purpose.
- For cooking, wait for coals — steady, even heat — and set the pot on stones or a grill above them.
- Ignition sources in order of ease: lighter (keep several), waterproof matches, ferro rod (sparks into cotton wool — practice this once), and full sun through a magnifying lens or glasses onto dark tinder.
- Boosters: cotton wool smeared with petroleum jelly (keep a film canister of it in each kit — lights instantly, burns minutes), cardboard dipped in wax, hand sanitizer (alcohol) on tinder.
- Wind trick: dig a shallow trench aligned with the wind or build between two rock walls — the draft feeds the coals like a bellows.
Staying cool without power
Priority one in our climate. The physics: block sun from entering, move air across wet skin, use the cool of night, and cool bodies rather than rooms. Combined with the heat-wave plan:
- Blockade the sun from outside its glass: shutters, foil, cardboard, or blankets over sun-facing windows — shade outside the glass is worth several degrees over curtains inside. Keep the whole house closed while outside air is hotter than inside.
- Night-flush: when the outside air finally drops below inside temperature (late night/pre-dawn), open windows on opposite sides for cross-ventilation; close everything again at sunrise. This cycle is the engine of powerless cooling.
- Live low and shaded: the lowest floor's most shaded room is the family day room; sleep there on the floor — floor level can be several degrees cooler than bed height.
- Evaporative cooling on bodies: wet cloth on neck, wrists, forearms; feet in a basin of water; damp (not dripping) sheet as a cover with any airflow; cool showers or pouring water over head and arms. In dry air this is powerfully effective; in humid coastal air it weakens — then shade, stillness, and hydration carry more of the load.
- Damp-sheet doorway: hang a wet sheet where a breeze enters; the air crossing it cools (again: dry air only).
- Cut indoor heat sources: no cooking indoors in daytime (cook outside, in the evening, or no-cook meals); lights off; devices off.
- Bodies: loose light clothing, activity only at dawn, water constantly, and watch each other for heat illness.
Staying warm without power
Desert winters and desert nights get genuinely cold, and an ill or injured person chills dangerously fast even at mild temperatures. The method is insulation, not flame.
- Shrink the space: everyone into one small room, doors closed, gaps under doors blocked with towels. Bodies heat a small room noticeably.
- Insulate the room: blankets or spare mattresses against the coldest wall and over windows (glass is the big heat hole); rugs or cardboard layered on hard floors.
- Layer bodies: several thin layers beat one thick one; always a hat (enormous heat loss from the head) and dry socks. Dry beats thick — change out of any damp clothing immediately.
- Bed like a nest: as much insulation under you as over you — compressed mattresses lose warmth downward. Two people sharing blankets keep each other warm; put children between adults.
- Hot water bottles (or tightly capped bottles of stove-heated water wrapped in cloth) into beds 15 minutes before sleep. Eat before bed — digestion heats you — and keep drinking; cold air dehydrates too.
- A tent or blanket-fort indoors concentrates warmth for sleeping children remarkably well.